Enable Private Networking with Confluent Cloud for Apache Flink
You have these options for using private networking with Confluent Cloud for Apache Flink®.
- PrivateLink Attachment: Works with any type of cluster and is available on AWS and Azure.
- Existing or new Confluent Cloud network (CCN): Available on AWS only. To create a new Confluent Cloud network, follow the steps in Create Confluent Cloud Network on AWS.
For more information, see Private Networking with Confluent Cloud for Apache Flink.
Enable private networking with Confluent Cloud Network
If you already have a Confluent Cloud Network (CCN) created and configured, which is usually the case when you have any Dedicated cluster, you can use this network directly to connect to Flink.
No setup, or minimum setup, is required to configure Flink, because you can reuse connectivity to existing Private Endpoints, Peering, or Transit Gateway. To access Flink from your local client, follow these steps.
Prerequisites
- Access to Confluent Cloud.
- The OrganizationAdmin, EnvironmentAdmin, or NetworkAdmin role to enable Flink private networking for an environment.
Configure DNS resolution
Ensure your VPC is configured to route your unique Flink endpoint to Confluent Cloud.
Have a client that is running within the VPC, or a proxy that reroutes your client to the VPC. For more information, see Use the Confluent Cloud Console with Private Networking.
If you already configured 1 and 2 for Apache Kafka® you may not need any changes.
For public DNS resolution with endpoints that resemble
flink-<network>.<region>.<cloud>.private.confluent.cloud: if your local machine was already configured to access Kafka, no additional setup is necessary.For private DNS resolution with endpoints that resemble
flink.<network>.<region>.<cloud>.private.confluent.cloud: if routing is using*.<network>.<region>.<cloud>.private.confluent.cloudno additional setup is necessary, but if your routing is using a more specific URL, you must add the Flink endpoint to your routing rules. Note that if you use a reverse proxy with a custom route added to your local host file, you must add the Flink endpoint to your host file.Routing to
flinkpls...confluent.cloudis necessary to enable auto-completion in the Flink SQL shell.
Enable private networking with PrivateLink Attachment
Private networking with PrivateLink Attachment works with any type of cluster and is available on AWS and Azure.
Prerequisites
- Access to Confluent Cloud.
- The OrganizationAdmin, EnvironmentAdmin, or NetworkAdmin role to enable Flink private networking for an environment.
- A VPC in AWS or a VNet in Azure.
Overview
In this walkthrough, you perform the following steps.
- Set up a PrivateLink attachment
- Create a PrivateLink Attachment.
- Create a private endpoint.
- For AWS, create a VPC Interface Endpoint to the PrivateLink Attachment.
- For Azure, create a private endpoint that’s associated with the PrivateLink Attachment.
- Create a PrivateLink Attachment Connection.
- Set up DNS resolution.
- Connect to the private network: If your client is not in the VPC or VNet, enable the Cloud Console or Confluent CLI to connect to your private network.
When the previous steps are completed, you can use Flink over your private network from the Confluent Cloud Console or Confluent CLI. The experience is the same as with public networking.
Step 1: Set up a PrivateLink Attachment and connection
In AWS or Azure, follow these steps to create a PrivateLink Attachment, a private endpoint, a PrivateLink Attachment Connection, and set up a DNS resolution.
- In Confluent Cloud, create a PrivateLinkAttachment.
- In AWS, create a VPC Interface Endpoint to the PrivateLinkAttachment service.
- In Confluent Cloud, create a PrivateLinkAttachmentConnection.
- Set up a DNS resolution.
- In Confluent Cloud, create a PrivateLinkAttachment.
- In Azure, create a private endpoint.
- In Confluent Cloud, create a PrivateLinkAttachmentConnection.
- Set up a DNS resolution.
Step 2: Connect to the network with Cloud Console or Confluent CLI
If your client is not in the VPC or VNet, enable the Confluent Cloud Console or Confluent CLI to connect to your private network.
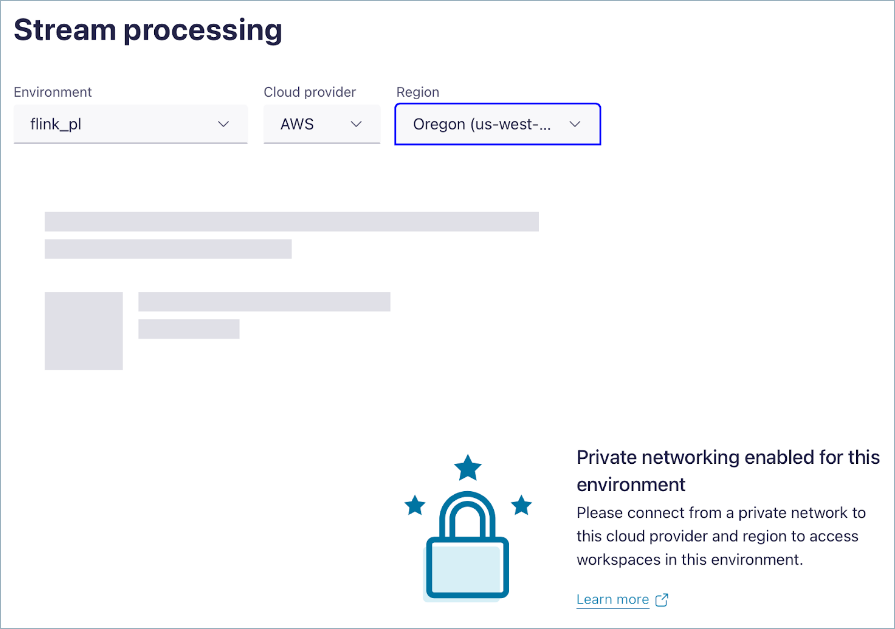
If you don’t connect from a machine in the VPC or VNet, you see the following error.

To connect to Confluent Cloud with your PrivateLink Attachment, see Use Confluent Cloud with Private Networking.
One way to connect is to set up a reverse proxy.
Create an EC2 instance.
Connect to the instance with SSH.
Install NGINX.
Configure Routing Table.
Set up DNS resolution: point to the Flink regional endpoints you use, as described in Step 6 of Configure a proxy.
<Public IP Address of VM instance> <Flink-private-endpoint>
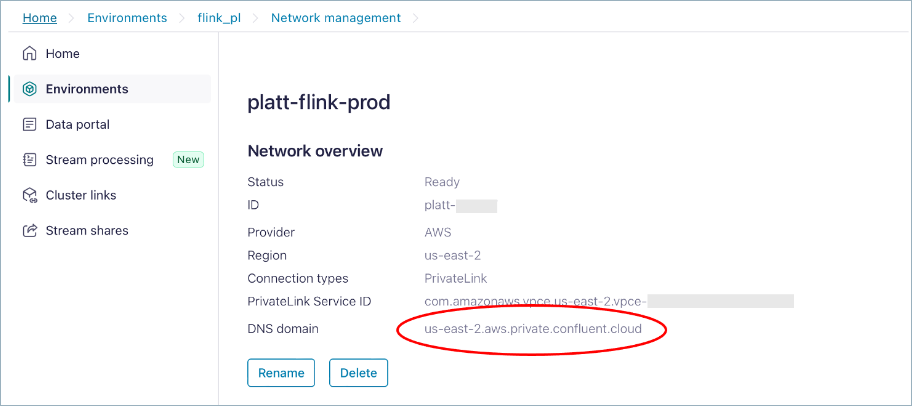
<Flink-private-endpoint>will resembleflink.<region>.<cloud>.private.confluent.cloud, for example:flink.us-east-2.aws.private.confluent.cloud.Find the DNS part of the PrivateLink Attachment by navigating to your environment’s Network management page and finding the DNS domain setting.

You can find the full list of supported Flink regions by using the Regions endpoint API.
Once networking is set up in Cloud Console, the interface uses the correct endpoint automatically, either public or private, based on the presence of a PrivateLink Attachment. If the connection is private, access to the Flink private network works transparently.